Blood and Bridges: First Contact
This is one of my favorite scenarios from the World at War series, featuring the British and Soviet units scrapping it out in their first fight of the game series. As usual, let's look at each side's forces before the action starts:
British OOB: The British Royal Lancers - 3 Scimitar tanks and a very deadly Striker. This is a very fast moving light armor company. If it tries to face down the Soviet T-80s, it's toast.
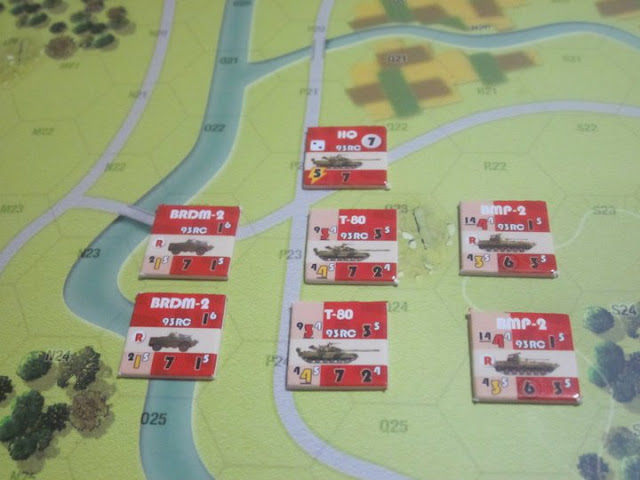
The objective is for one side to either destroy more units than the other or exit more units off the opposite map edge. The Soviets enter on turn 1 on the east side of the map and approach the southern lip of Faulbach.
The British Royal Lancers have entered from the west side. The British could be in real trouble if they don't play things smart and hit from a distance. The only tank they have that can do any real damage to the Soviets is the Striker. The Scimitars are virtually useless.
Well, looky here! The British HQ has ordered in artillery strikes on the Soviet positions. FASCAM mines are deployed to the west of the Soviet position. A smoke barrage is called in right on top of the Soviet HQ and the T-80 tanks.
The mines prevent the Soviets from rushing through the map and assaulting the British at close range, which would be absolutely devastating for the Royal Lancers' light tanks. The smoke barrage prevents the Soviets from being able to fire their weapons through the smoke cloud. The only option available to the Soviet commander is to enter Faulbach without any real cover or go into the forested hills down south.
Same tactic as before: The British commander waits for the Soviet tanks to make it to the crest of the hill and then calls in his last FASCAM strike. The mines now prevent the Soviets from rushing downhill and hitting at the British. The final smoke volley lands near the Soviet HQ, obscuring their view. The Soviets can try to rush downhill into the minefield or find another way around.
Still early in the game...The Soviets are now in the forested hills way south of Faulbach. The British Royal Lancers race south in an attempt to set up a trap. Can they get there in time?
The 93rd Recon decides to find another way around and maneuvers up north and finds a narrow corridor through the mines just south of Faulbach and the treeline south of it.
The British Striker manages to take out both Soviet BRDM scout cars with Opportunity Fire. So far, the score is UK: 2, USSR: 0.
With two turns left, the Russian commander makes the Hail Mary play and sends the BMPs west to try and exit the edge of the map before time is up. In the meantime, the T-80s move south back up the hill in an attempt to provide cover fire for the BMPs as they make a dash.
Turn 8 passes with no activations for either side. Turn 9 starts and the Soviet commander opens up on the Royal Lancers bunched up in the woods to the south. The T-80s destroy a Scimitar platoon and disrupt the British HQ. They take another shot again but miss.
The BMPs up north can't make it to the map edge in time for the game to end.
Final score: UK 2, USSR 1
Good scenario! There was a lot of tension as I tried to keep the fragile British armored forces from getting shot to pieces by the powerful Soviet T-80 tanks.
The British commander was in control for the entire game by smart deployment of minefields and smoke barrages. When you deploy minefields, you basically determine where your enemy is going to move and that allows you time to set up ambushes, etc. Also, deploying smoke right on top of your enemy is a good way to force them to move on to a new place and give yourself cover to maneuver to a new place as well.
Next time I play this scenario, I'll definitely use the Chaos! marker to make it a little more interesting.


Comments
Post a Comment