Posts

Showing posts from April, 2012

LnL; Heroes of the Blitzkrieg - Poker Trick in Martelange

Image
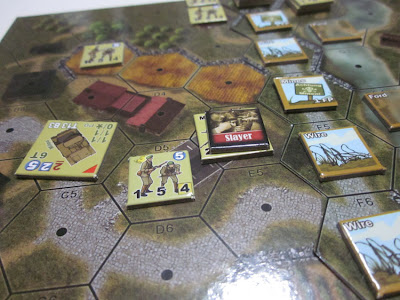
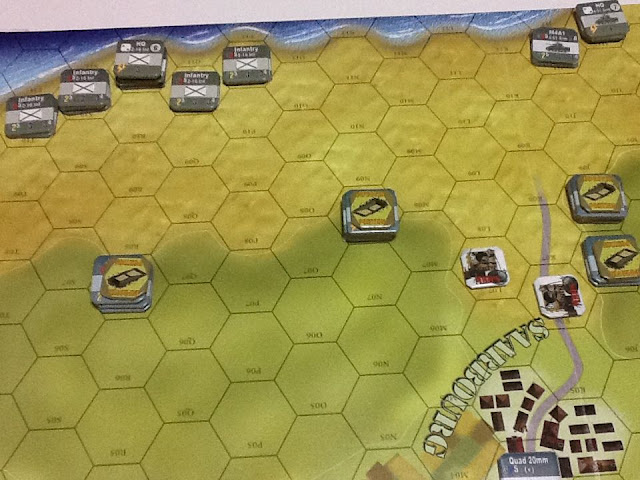
This scenario from Lock 'n Load's Heroes of the Blitzkrieg features the 1st Panzer Division's attempt to cross the border from Luxembourg to Belgium on May 10th, 1940.  The German player has to try and get as many units as possible across a river  while the Belgian player has to stop them.  Things are complicated by a Panic! rule whereby Belgian units might be forced to retreat every time a German unit successfully crosses over to the western bank. The Belgians set up on the west side of the river behind lots of barbed wire and mines.  There's an old WWI-era machine gun in the center of the town on the upper floor of a church. The Belgians wait for the 1st Panzer Division. The Germans have an impressive array of forces with them.  They've got mobile units that include motorcycles with side cars and some of the newer German scout vehicles.  They've also got a mortar team for support. The Germans wait, ready in the east, ready to strike acros

Band of Heroes - Swift & Bold: Expected Company

Image
LnL's Swift and Bold is an expansion to their squad-based WW2 wargame, Band of Heroes .  Swift & Bold features the British forces, vehicles, and even gliders. There are about a dozen new scenarios in the expansion with brand new counters.  Players can use the maps already provided with Band of Heroes and the scenarios here are really nicely crafted.  Most of the scenarios are a bit smaller and have fewer units but there are a couple of real slug-fests for those who enjoy those big battles with everything but the kitchen sink in there. Today, I just finished a scenario from Swift and Bold called "Expected Company".  It's the day after D-day and the British paras are defending against a German counter-attack.  The Germans have to clear the roadside in the middle of the board while the Brits try to stop them. For a variety of reasons, I think this scenario shows what can go wrong when you get too fixated on one goal and blind yourself to what the enemy is doing.

Boots on the Ground: Hot LZ

Image
Although I talk a lot about Lock 'n Load products on this blog, it's nice to take some other games off the shelf once in a while just to see what other game companies are doing.  Lately, I've developed a bit of a man-crush on Worthington Games, which has consistently delivered an interesting variety of games covering lots of different topics.  Today's report is of the scenario, "Hot LZ" from WG's Boots on the Ground . "Dammit!" Lt. Waterman muttered in exasperation as he watched helplessly.  His ride home, a big beautiful UH-60 Blackhawk, was turning around and heading back to base. Tracer fire fell short of the helicopter as it increased altitude and raced off.  With so many insurgents in the area, there was no other choice but to do this the hard way and get Team Alpha back to the Green Zone on foot.  That wasn't especially good, especially as rounds from nearby windows were hitting the walls and pavement near him and his 6-man squad.

Lock 'n Load: Band of Heroes - Tameville Breakout

Image
As tank fire and .50 caliber machine gun bullets ripped out chunks of the upper floor room he crouched in, all Captain Weiss could do was wish that he had finished his cup of coffee this morning before heading out on patrol. It was June 7, 1944 and earlier that day in a small town near St Come du Mont, he had patiently outlined his patrol plan to his men and fellow Fallschirmjäger while sipping on his favorite French blend and studying the map around Tameville.  The word was already out that the Allies had landed in northern France but it was nearly impossible to separate rumors from fact at this stage. Despite that, the sound of artillery and heavy machine gun fire that punctuated yesterday and all last night was confirmation enough that there was fighting in this sector.  Weiss gathered his men near a field.  "Men, you have undoubtedly heard that the Allies have landed in France and they are pushing inland.  Our mission is to find the enemy positions so that the rest of the

World at War: The Untold Stories - The Princess and the Dragoon

Image
In the third scenario of Lock 'n Load's World at War:  The Untold Stories , there's a classic match-up consisting of the Canadians versus the East Germans.  This scenario is a tough one for both sides since there are multiple objectives and lots of different forces to contend with. The NATO forces include the 2nd PPCLI (Princess Patricia's Canadian Light Infantry) and the Royal Dragoons "A" Squadron.  2PPCLI has a couple of tank platoons mixed in with infantry and M113s while the Dragoons consist entirely of Leopard C1 tanks.  About halfway through the scenario, the Canadians get CF-18 close air support, which is pretty cool since I've always loved the CF-18s. The East Germans get lots of toys to play with.  They have the 51st tank division with lots of T-72s.  The 29th MS is a motorized regiment with some tanks mixed in with infantry and BMP-2 infantry transports.  They also get a BRDM scout car with a Shilka mobile AAA platform.  Last but not least,

Corps Command: Dawn's Early Light - NATO Fire and Movement

Image
This is (probably) my final article dealing with strategy in LnL's Corps Command:  Dawn's Early Light .  As I mentioned in my previous post, the key to Soviet victory is finding a NATO weak spot while maneuvering your other units around the other defenders to either prevent NATO reinforcement or to protect your own breakthrough elements. For the NATO player, there are some essential points to keep in mind in order to successfully defend against a Warsaw Pact invasion. The first point is setup and formation. Setup Advice:  Where should the US player set up?  In the first scenario, the US is tasked with defending the southern sector of the board.  The West Germans get the north part to defend.   The amount of clear terrain from the board's eastern edge to the city of Eisenbach poses some real problems.  American reinforcements take a long time to get to the front and the US doesn't have many units to use as defense.  Even with an activation number of 5 (6 MP), the U

Corps Command: Dawn's Early Light - Soviet Movement and Fire

Image
Last week, I talked about some fairly basic principles behind LnL's Corps Command:  Dawn's Early Light and I urged the Soviet player to consider moving rather than fighting as the best course of action most of the time.  Today I'm going to go into this a little deeper and talk about how the Soviet player can use movement to his best advantage.  Let's start with a fairly common situation that usually happens in most scenarios: This shot is from the right side of the board and it's fairly early in the game. The Soviets are trying to push southwest (lower left) towards Eisenbach with the 1st Guards Tank Division.  The American player has made some good decisions about defensive positions by placing infantry in the appropriate terrain and by tightening the zones of control for each unit so that the Soviet player cannot just barge down south and take the city.  Zone of Control is vital in this game because it determines not only who you can attack but also h

Nations at War: White Star Rising - Omaha Beach

Image
In scenario 7 of Lock 'n Load's WWII platoon-level combat game, Nations at War:  White Star Rising , the Americans are trying to take Omaha Beach on D-Day, June 7, 1944.  The US objective is to get off the beach, get behind those Germans and take the town of Saarbourg. The Germans get six infantry platoons, a couple of HMGs, a 20mm quad cannon, some mortars and several improved positions, which I guess are supposed to represent bunkers.  I set up the German HQ on the hill to the west with some infantry and an HMG as well as a powerful 88mm AT gun.  Two more platoons set up a bit further to the west and east while the anti-air and mortars sit back in the town.  Just so the Allies can't make a straight dash for the town and ruin my day, I've placed two minefields on the roads from the beaches. For American OOB, we get 9 infantry from the 2/16 and some M4A1 tanks from the 4/51st armor and they set up on the beach next to the water hexes.  Before setup, you have to chec

World at War: Eisenbach Gap - Maelstrom

Image
OOB:   US Alpha, Charlie, and Delta teams.  USSR gets 33rd MRD and 1st Tank as well as two Mi-24 Hind helicopters from the 69th AHR. Soviet Objective: Move 6 units from south to north off the map.  Setup:  I set up the Americans on the hills overlooking the approaches to the south. I don't like putting the Chaparral so far up front but it's no use to me if it's sitting safe in a city somewhere while my units are getting destroyed by Soviet air. Infantry from Charlie and tanks from Alpha set up a trap for the Russians. I put Charlie on the hill to the west with a Dragon AT weapon. Alpha HQ and the SAM sit on the hill to the east. And to the east of that  lies the rest of Alpha Troop. The Bradleys would normally be out of command range but since they're Recon units, they can act independently even when they're pretty far from their HQ. Game Start: The Soviet 1st Tank Division charges along the west edge of the map taking light fire from Charlie but