In scenario 7 of Lock 'n Load's WWII platoon-level combat game,
Nations at War: White Star Rising, the Americans are trying to take Omaha Beach on D-Day, June 7, 1944. The US objective is to get off the beach, get behind those Germans and take the town of Saarbourg.
The Germans get six infantry platoons, a couple of HMGs, a 20mm quad cannon, some mortars and several improved positions, which I guess are supposed to represent bunkers. I set up the German HQ on the hill to the west with some infantry and an HMG as well as a powerful 88mm AT gun. Two more platoons set up a bit further to the west and east while the anti-air and mortars sit back in the town. Just so the Allies can't make a straight dash for the town and ruin my day, I've placed two minefields on the roads from the beaches.
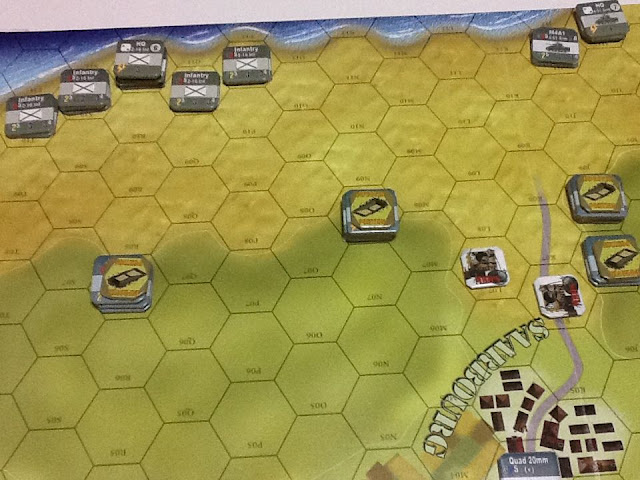
For American OOB, we get 9 infantry from the 2/16 and some M4A1 tanks from the 4/51st armor and they set up on the beach next to the water hexes. Before setup, you have to check if the M4s make it safely to shore by rolling a dice. Oops! It looks like some of those tanks did not make it on to the beach. Two platoons are reduced by half strength. Not a good start for the Allies.
 |
| Setup: The US 2/16 infantry to the northwest and the 4/51st armor to the northeast. |
Turn 1 comes and things definitely don't look good for the US. The German Schtz. Btl 107 fires off its 88 and takes out one of the American M4 platoons over to the east. Machine gun fire from both bunkers hits the US infantry from the 2/16 reducing one platoon and disrupting the other.
Despite taking some heavy fire from the bunkers, the 2/16 manages to shake off the damage and finds its way to the berm. The tanks from the 4/51st, however, seem to enjoy hanging around in range of 88mm anti-tank guns and don't move much.
 |
| The US infantry moves up to the German bunkers. |
Eventually, the 4/51st gets moving after the US commander calls some artillery down on the German bunkers near them. With the Germans disrupted, the 4/51st makes its way up onto the hillside.
The US infantry takes more fire from the German HMGs but it starts sending masses of infantry on close assaults, which finally dislodges the Germans from one of their bunkers.
 |
| US infantry takes one of the German bunkers. German infantry retreats. |
While things are starting to look up for the Americans on the west side of the beach, disaster strikes for the tanks on the east side. The Germans manage to disrupt and close assault the HQ unit, destroying it completely. The 88mm ATGs finish off the final American M4A1 platoon. There are now no US tanks on the beach. It's completely up to the infantry.
 |
| All that's left of the US tanks are flaming wrecks. |
The US gets some luck when a P-47 fighter arrives and does some serious damage to exposed German infantry that assaulted the Sherman HQ units. Eight .50 caliber guns will do that sort of thing. It's not an equal measure of revenge but it's a little consoling. The US infantry makes its way across the hill and towards the objective, the town of Saarbourg. The Germans start pulling units back from their bunkers to defend the town.
 |
| US infantry gets closer to the town as German units start pulling back to fight them |
Eventually, the town fills with Germans, ready to turn the battle into a slaughter. Mortar units and anti-aircraft weapons are pulled out of the town and infantry is sent in. Opportunity fire hits some of the US infantry as they approach the outskirts of the town. Some platoons are reduced but the offensive continues.
 |
| Germans start filling up the town, waiting for the US onslaught. |
The US commander sees his chance and with one artillery fire mission left, he calls in HE on top of the town. Although both sides spend fate points back and forth like sailors on shore leave, the US barely prevails and the Germans take a pounding. The town is softened up. The 88s are used against the Americans while mortars and quad cannon fire hit at them from the forests to the southeast. The US manages to grab hold of two hexes in the town but the Germans still hang on tightly to the third hex and time is running out for the Americans...
 |
| The Americans hold 2/3s of Saarbourg. Can they grab the rest before time runs out? |
The Germans activate again and again, pouring on the fire and trying desperately to hang on to the town. Terrible rolling from the ATGs, mortars, and the quad cannons prevent any real damage being done to the US. The Germans in town open up with heavy machine gun fire at close range on the US, disrupting some of them. However, the US pulls together for a final assault during the very last activation of the game. A single infantry platoon manages to dislodge the German HQ in a close assault, taking the very last hex needed for victory. What a game.
 |
The Germans are vanquished as the US takes the town of Saarbourg near Omaha Beach.
|
Great game! A couple of things: The Germans can also win by taking some of the hexes near the water. It's a victory condition that I forgot about it until just now. However, the battle for the town seemed much more dramatic. As the German, I should have seen what the US was trying to do and pulled my support units back a lot sooner. The German infantry on the eastern hill should have been heading back to the town the instant the tanks were gone. Good placement of anti-tank defenses and mines meant that the Americans had to choose a real detour to get to the town, which was good. Of course, it's easy to forget about artillery fire missions and here it was a fatal mistake. With all that infantry and equipment massed in the town, it was an easy decision for the US commander to call in his final artillery strike right on top of them.
The US commander should have coordinated a bit more closely between the 4/51st armor and the 2/16 infantry. It's impressive that the US infantry was able to win alone but it would be better to be much more careful with the tanks and keep them out of range of infantry fire and assaults. I think the US won by focusing tightly on objectives rather than scattering units to take out many different bunkers at once.


Comments
Post a Comment