Posts

Designer's Diary Part 7: Historical Scenario 1 Background

Image
In my game, That Others May Live, the first historical scenario is called “Cauldron of Fire” on page 9 of the TOML rulebook. Here's the description: It is June 1968. While bombing enemy supply trucks at the north end of the A Shau valley, an A-4 Skyhawk is shot down by surprisingly heavy and accurate anti-aircraft fire. The pilot ejects, but is seriously injured. His wingman and a “Nail” FAC are already on the scene when the Combat Search and Rescue team arrives. High winds prevent the use of some special weapons in the rescue operation. Historically, the mission was a failure. It was abandoned after one of the rescue helicopters was destroyed by enemy fire. There were no survivors. A ground team was later inserted to find the pilot, but failed to locate him. This scenario is loosely based on the events of June 9 and 10 th , 1968 when US Marine Captain Walter Schmidt callsign Hellborne 215 was shot down by enemy anti-aircraft fire while on a bombing mission over the A Shau ...

Designer's Diary Part 6 - That Others May Live: The Cards

Image
With the recent release of my game, That Others May Live: Combat Search and Rescue - Vietnam , I thought I'd explain the history and some facts behind some of the cards. One of the challenges of designing TOML was trying to simulate the effects of different kinds of ordnance and aircraft maneuvers with counters and cards.  Since I wanted to avoid the use of hexes and math-heavy charts, I needed a way to illustrate how certain ordnance worked. The cards and markers in the game give a rough approximation of their effects on the battlefield. In this post, I'll provide a little more background that might help to shed light on the game's mechanics and how and why the ordnance was historically employed. Much of the information here was taken from Ralph Rowley's report called Tactics & Techniques of Close Air Support Operations 1961 - 1973 . Various first-hand accounts of combat aviators helped to further inform my approach to the design and effects of the cards and I'...

Designer's Diary 5: That Others May Live - An Example of Play

Image
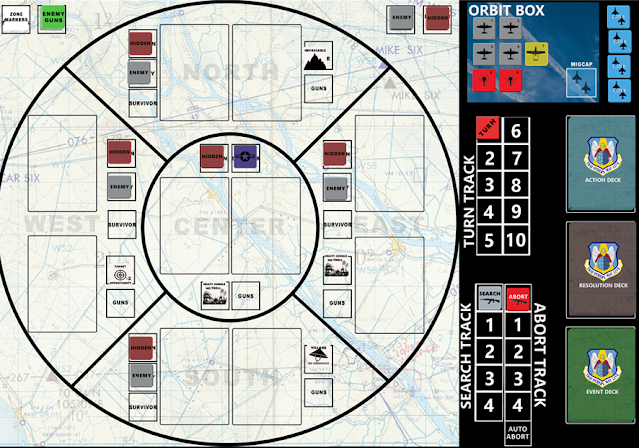
This article provides an example of play for That Others May Live using the standard scenario "Caged Tiger" (page 8 / section 7.0). Throughout this Example of Play, I'll be using page numbers and sections (divided by a slash) from the rulebook to highlight specific rules to which I'm referring or that need special attention. A good way to learn the rules is to set up the scenario as below, read through the example, and refer to the rules at each reference point. The pictures below are from the playtest art, which have only cosmetic differences from the end result. You should be able to follow the example quite easily despite these alterations.  Setup Setup As the Setup specifies, we draw Hidden, Enemy, and Zone markers from their respective draw cups. We place a Hidden marker in each Zone face down. Enemy markers are placed in each Outer Zone. (page 15 / 9.4) Zone markers are placed in each zone (page 14 / 9.3). Clockwise starting from the North Outer Zone, we have...