Pacific War - The Battle of the Coral Sea
I recently bought a very used copy of "Pacific War" (Victory Games, 1985) designed by Mark Herman during the heyday of Victory Games. I realized that I could have just waited for the impending reprint to be released but I'm an impatient man. I don't often get a jones for monster WW2 Pacific games but when I do, I want my fix right away.
Anyway, I spent the first week of September going through the rules and playing a couple of the engagement scenarios just to get a feel for the game system. Specifically, I muddled through the Pearl Harbor scenario and worked through the air strike rules. The rules seemed really dense at first but after I went through the examples carefully and took some notes, it all just clicked together at one point. I had a similar experience with Gulf Strike too.
After I finished playing Pearl Harbor and reading through the rules and the detailed example of the Battle of the Coral Sea scenario, I felt confident enough to try the larger battle scenarios. These are different from engagements because they generally have more units, take place over a longer time span, and give the player more interesting decisions to make. So I went with the Battle of the Coral Sea scenario and here is what happened. Just a note that I played the scenario on paper map with cardboard counters and I took photos but they were pretty bad. I've tried to recreate to the best of my ability what happened with Vassal and I've taken screenshots. I took very extensive notes so I think this pretty accurate.
Objectives - There are three levels of victory for both sides - decisive, substantive, and tactical. Japanese get decisive victory by capturing Guadalcanal and Port Morseby and sinking or crippling the Lexington or Yorktown. The Americans get a decisive victory by keeping the Japanese from fulfilling their victory conditions and sinking a Japanese CV or CVL.
The Japanese plan was to use Task Force 4 (CVS K-Maru, two light cruisers, and a destroyer-transport) to land engineers in Guadalcanal while Task Force 3 (two cruisers, CVL Shoho, and an amphibious transport) sends its 144 infantry regiment and marines battalion to land in Port Morseby to take it from the Australian 30th Brigade. Task Force 1's job (CV Kuikaku and CV Shokaku with a cruiser and DD) was to find the American carriers and sink them.
The Operation Player Contact Phase started off the game and the Japanese naval units moved 4 hexes over the course of two days. The Allied player stopped the Japanese player at this point because Japanese Task Force 3 was detected rounding the cape near Port Moresby in hex 1328 (China Strait). The Allies hoped to intercept and sink it before the Japanese forces made a landing.
The Reaction Player Contact Phase commenced and the Americans moved their Task Force 2 (Kent and Northampton) from the port of Townsville north towards Port Moresby. Task Force 1 (Lexington and Yorktown with 2 cruisers and a DD) moved from hex 0135 (way off at the very southern edge of the map) four hexes to the north on its long journey towards the battle area. The Allied player shuffled some of the air units around, moving the LRA from Townsville to Thursday Island in hex 1523. This got the air unit much closer to the action near Port Moresby where it could hopefully detect some Japanese ships and steer the Allies limited air and naval assets to high value enemy targets. With the American carriers still far off, there was no much left to do.
On days 3 and 4 of the battle, American planes from Port Moresby managed to score a couple of hits on Lae airfield but it didn't do much. Both sides failed to detect each others' naval units but the Australians and Americans knew full well that there was a Japanese task force steaming for Port Moresby. Allied Task Force 2 steamed towards the coast of Port Moresby to try and protect it.
But they were not fast enough. The Japanese ships showed up during the Disadvantage Movement Phase and their marines and infantry stormed ashore. The Japanese used air missions to try and break the defending Australian brigade in the hex but failed to shake them (roll equal to or under the troop quality rating, which is "5" in this case). Meanwhile, further south, Japanese Task Force 4 landed their engineers on Guadalcanal without a hitch.
The Japanese decided to use the darkness to their advantage and set the lighting phase to night for the next cycle. They won advantage determination too. Japanese bombardment of Port Moresby resulted in another troop quality check against the Aussies, which they passed again. It seemed the Port Moresby would not be so easily won. In the ground combat phase, the Japanese player was rolling on the 7 column on the CRT due to the troop differential (half troop quality for amphibious invasions and a two column shift left due to the terrain). The die roll came out a 4, which meant 2 losses for the attacker and 1 for the defender. The Japanese assigned 1 hit each to their marines (eliminating them) and 144 regiment while the defending Aussies took one hit. The battle for Port Moresby was far from over. The Allied player slips his Task Force 2 off the coast of Port Moresby into the same hex as Japanese Task Force 3. The marker moves to Day 6.
The Battle Cycle lighting condition is Day A.M. and the Japanese win Advantage again, rolling a 9 versus the Allied roll of 4. During the Japanese naval movement, they manage to detect Allied Task Force 2 and the Japanese carriers from Task Force 1 send two single-engine planes to hit it. The Japanese air mission is detected as it enters the Port Moresby hex and an American fighter on CAP tries bravely to shoot it down. Unfortunately, it is outclassed by the Zeros and the fighter unit is eliminated after suffering 2 step losses. The Japanese air units take a single hit from flak but manage to inflict 2 hits on the Kent-class ship (HMAS Australia?) before returning to their carriers.
In the Naval Combat Phase, we have two Allied cruisers taking on an entire Japanese task force. The CA Kent gets nailed by CA Furutoka's guns for 3 damage (1 critical) and is sunk while the Northampton holds its own and gets 2 hits back on CA Furutoka.
The Northampton manages another hit on the Furutoka in the next naval combat phase. Although the Japanese cruiser is not sunk, the Americans have at least avenged the loss of the Kent-class ship.
During the Bombardment phase, the Japanese CA Aoba performs bombardment on Port Moresby and hits, forcing yet another troop quality check on the Australians. This time, however, the pressure is too much and the Australians break. The Japanese now see a chance for taking the port. The troop quality for the Japanese is 6 while the Australians are halved at 3. There is a 2 column shift to the left on the CRT due to terrain. The Japanese player rolls a disappointing 7 and the result comes out as 1 step loss for both the attacker and defender. The Japanese 144 regiment now has only 1 step left while the Australians have only 2 left.
The Allies spend their movement phase getting Task Force 1 shambling towards the battle area. In the disadvantage air mission phase, they go for broke and send up a two engine bomber to strike the Japanese 144 unit. Miraculously, it is undetected as it arrives in the Port Moresby hex and a lucky roll of 1 results in a Troop Quality check for the Japanese 144 regiment, which it fails due to the Japanese player rolling a 9.
The day marker is moved to day 8 and the lighting condition is determined randomly. We get a 3 and it is Day P.M.
For the first time in the game, the Allies win advantage for the turn and Task Force 1 is finally getting within striking range of the Japanese. However, the LRA units and spotters are not doing their jobs well and there is nothing found to hit. In the Naval Combat Phase, the Northampton is still fighting alone against the entire Japanese Task Force 3 just off the coast of Port Moresby. It gives no quarter, inflicting 1 hit on the Aoba before getting hit by a torpedo and then hit again by the Japanese guns.
During the Bombardment phase, the Aoba tries to bombard Port Moresby again. This time, the Japanese player gets a 4, which would have been a hit on the Australians except for the fact that the Aoba has been damaged by the Northampton and had its bombardment value reduced.
During the ground combat phase, we are left with two broken units fighting each other. The result on the CRT is a 1:0 so the Japanese 144 regiment takes a final hit and is eliminated while the Australians are fine. The Aussies make their rally roll and are back and ready for more.
In the Disadvantage Movement Phase, Japanese Task Force 1 stays put as it is in striking range of the US carriers though they are undetected. With the failure of the Japanese amphibious invasion, Task Force 3 withdraws from the coast of Port Moresby.
The Day marker is moved from 8 to 10. The lighting marker moves clockwise along the track and we are at Dusk. The Allies win advantage.
During the advantage movement phase, the Allies manage to detect Japanese Task Force 1 and see their chance to go up a victory level by possibly sinking one of the Japanese carriers. Both air units from the Yorktown and Lexington scramble during the air mission phase and strike out at the Japanese TF only 3 hexes away. The mission is uncoordinated.
The American planes are detected as they reach the Japanese carrier task force and they get intercepted by Japanese CAP. A brutal battle in the air follows, with the Japanese thoroughly trashing the Americans. They score 3 hits on the American air units, 2 of which are taken on one air unit (aborting it) while the remaining American air unit takes another hit. Flak from the Japanese ships inflicts 1 more hit, which aborts the other plane. Misery. The only positive thing for the Americans is that they suffered no step losses during the dusk carrier landing procedure.
The Disadvantage Movement phase for the Japanese ends up with the American Task Force 1 detected so they send out their planes to hit at the Allied ships this time. The mission is coordinated.
The Japanese planes are detected as they arrive in the same hex as the American carriers. This time, the CAP results are reversed. The US player takes 3 hits on CAP from the Japanese, which eliminates one of the American carrier air units completely. The Japanese take 1 hit in the air battle. They take another hit from the American flak on the way to their target (primary is Lexington, secondary is Yorktown). Unfortunately, both attacks miss and the Japanese return to their carriers. During the dusk landing procedure, the Japanese player rolls an 8 for one of the air units and takes 1 hit. What a disaster.
The Day Marker moves from 10 to 12 and the Lighting condition is Night. The Americans use the cover of night to retreat back towards Australia while the Japanese begin to withdraw from the battle. Neither side has a decisive advantage in air or ships to take the other on and win while still having enough time to Deactivate. There is no way to pit the remnants of these two forces against each other in a way that makes any sense within the general framework of the war. Neither side managed to fulfill their victory conditions at even a tactical level so the result of the battle is a draw.
Conclusion: Wow! What an incredible game. It is a very tense affair with lots of units doing different things and somehow it all comes together and just makes good sense. I love the built-in "time compression" of the Contact Phase that allows for several days to pass before slowing down the action in the Battle Cycle. I found the search procedures a little difficult and tedious at first but by the end of the battle, it was second nature.
I found the struggle for Port Moresby to be very tense and I was interested in how it drew in all the different kinds of units and desperate attempts by both sides to change the course of the land battle. I am interested to see what kind of changes that Mark Herman makes for the new edition of Pacific War because this seemed quite polished and intuitive even for a 30 year old game. If you are interested at all in this period of history, I suggest giving it a try.
Although there are some huge campaigns that take hundreds of hours to play, there are also eight battle scenarios like this one that are very playable in a short amount of time and probably just as enjoyable. One thing I would have to mention is that the counter information is extremely small. I hope this issue is addressed somehow in the reprint. Anyway, great stuff!
Anyway, I spent the first week of September going through the rules and playing a couple of the engagement scenarios just to get a feel for the game system. Specifically, I muddled through the Pearl Harbor scenario and worked through the air strike rules. The rules seemed really dense at first but after I went through the examples carefully and took some notes, it all just clicked together at one point. I had a similar experience with Gulf Strike too.
After I finished playing Pearl Harbor and reading through the rules and the detailed example of the Battle of the Coral Sea scenario, I felt confident enough to try the larger battle scenarios. These are different from engagements because they generally have more units, take place over a longer time span, and give the player more interesting decisions to make. So I went with the Battle of the Coral Sea scenario and here is what happened. Just a note that I played the scenario on paper map with cardboard counters and I took photos but they were pretty bad. I've tried to recreate to the best of my ability what happened with Vassal and I've taken screenshots. I took very extensive notes so I think this pretty accurate.
Objectives - There are three levels of victory for both sides - decisive, substantive, and tactical. Japanese get decisive victory by capturing Guadalcanal and Port Morseby and sinking or crippling the Lexington or Yorktown. The Americans get a decisive victory by keeping the Japanese from fulfilling their victory conditions and sinking a Japanese CV or CVL.
The Japanese plan was to use Task Force 4 (CVS K-Maru, two light cruisers, and a destroyer-transport) to land engineers in Guadalcanal while Task Force 3 (two cruisers, CVL Shoho, and an amphibious transport) sends its 144 infantry regiment and marines battalion to land in Port Morseby to take it from the Australian 30th Brigade. Task Force 1's job (CV Kuikaku and CV Shokaku with a cruiser and DD) was to find the American carriers and sink them.
 |
| Initial Setup of Forces |
The Operation Player Contact Phase started off the game and the Japanese naval units moved 4 hexes over the course of two days. The Allied player stopped the Japanese player at this point because Japanese Task Force 3 was detected rounding the cape near Port Moresby in hex 1328 (China Strait). The Allies hoped to intercept and sink it before the Japanese forces made a landing.
 |
| End of Operation Player Contact Phase |
The Reaction Player Contact Phase commenced and the Americans moved their Task Force 2 (Kent and Northampton) from the port of Townsville north towards Port Moresby. Task Force 1 (Lexington and Yorktown with 2 cruisers and a DD) moved from hex 0135 (way off at the very southern edge of the map) four hexes to the north on its long journey towards the battle area. The Allied player shuffled some of the air units around, moving the LRA from Townsville to Thursday Island in hex 1523. This got the air unit much closer to the action near Port Moresby where it could hopefully detect some Japanese ships and steer the Allies limited air and naval assets to high value enemy targets. With the American carriers still far off, there was no much left to do.
 |
| End of Reaction Player Contact Phase |
On days 3 and 4 of the battle, American planes from Port Moresby managed to score a couple of hits on Lae airfield but it didn't do much. Both sides failed to detect each others' naval units but the Australians and Americans knew full well that there was a Japanese task force steaming for Port Moresby. Allied Task Force 2 steamed towards the coast of Port Moresby to try and protect it.
But they were not fast enough. The Japanese ships showed up during the Disadvantage Movement Phase and their marines and infantry stormed ashore. The Japanese used air missions to try and break the defending Australian brigade in the hex but failed to shake them (roll equal to or under the troop quality rating, which is "5" in this case). Meanwhile, further south, Japanese Task Force 4 landed their engineers on Guadalcanal without a hitch.
 |
| Japanese troops land on Guadalcanal (TF4) and assault Port Moresby (TF3) |
The Japanese decided to use the darkness to their advantage and set the lighting phase to night for the next cycle. They won advantage determination too. Japanese bombardment of Port Moresby resulted in another troop quality check against the Aussies, which they passed again. It seemed the Port Moresby would not be so easily won. In the ground combat phase, the Japanese player was rolling on the 7 column on the CRT due to the troop differential (half troop quality for amphibious invasions and a two column shift left due to the terrain). The die roll came out a 4, which meant 2 losses for the attacker and 1 for the defender. The Japanese assigned 1 hit each to their marines (eliminating them) and 144 regiment while the defending Aussies took one hit. The battle for Port Moresby was far from over. The Allied player slips his Task Force 2 off the coast of Port Moresby into the same hex as Japanese Task Force 3. The marker moves to Day 6.
 |
| Start of day 6 |
The Battle Cycle lighting condition is Day A.M. and the Japanese win Advantage again, rolling a 9 versus the Allied roll of 4. During the Japanese naval movement, they manage to detect Allied Task Force 2 and the Japanese carriers from Task Force 1 send two single-engine planes to hit it. The Japanese air mission is detected as it enters the Port Moresby hex and an American fighter on CAP tries bravely to shoot it down. Unfortunately, it is outclassed by the Zeros and the fighter unit is eliminated after suffering 2 step losses. The Japanese air units take a single hit from flak but manage to inflict 2 hits on the Kent-class ship (HMAS Australia?) before returning to their carriers.
In the Naval Combat Phase, we have two Allied cruisers taking on an entire Japanese task force. The CA Kent gets nailed by CA Furutoka's guns for 3 damage (1 critical) and is sunk while the Northampton holds its own and gets 2 hits back on CA Furutoka.
 |
| Brave little task force 2 takes on Japanese task force 3 off the coast of Port Moresby. |
The Northampton manages another hit on the Furutoka in the next naval combat phase. Although the Japanese cruiser is not sunk, the Americans have at least avenged the loss of the Kent-class ship.
 |
| HMAS Australia. Kent-class heavy cruiser. |
During the Bombardment phase, the Japanese CA Aoba performs bombardment on Port Moresby and hits, forcing yet another troop quality check on the Australians. This time, however, the pressure is too much and the Australians break. The Japanese now see a chance for taking the port. The troop quality for the Japanese is 6 while the Australians are halved at 3. There is a 2 column shift to the left on the CRT due to terrain. The Japanese player rolls a disappointing 7 and the result comes out as 1 step loss for both the attacker and defender. The Japanese 144 regiment now has only 1 step left while the Australians have only 2 left.
 |
| Japanese heavy cruiser Aoba. |
The Allies spend their movement phase getting Task Force 1 shambling towards the battle area. In the disadvantage air mission phase, they go for broke and send up a two engine bomber to strike the Japanese 144 unit. Miraculously, it is undetected as it arrives in the Port Moresby hex and a lucky roll of 1 results in a Troop Quality check for the Japanese 144 regiment, which it fails due to the Japanese player rolling a 9.
 |
| US and Japanese carriers inch towards each other as US air unit strikes Japanese ground units in Port Moresby. |
The day marker is moved to day 8 and the lighting condition is determined randomly. We get a 3 and it is Day P.M.
For the first time in the game, the Allies win advantage for the turn and Task Force 1 is finally getting within striking range of the Japanese. However, the LRA units and spotters are not doing their jobs well and there is nothing found to hit. In the Naval Combat Phase, the Northampton is still fighting alone against the entire Japanese Task Force 3 just off the coast of Port Moresby. It gives no quarter, inflicting 1 hit on the Aoba before getting hit by a torpedo and then hit again by the Japanese guns.
During the Bombardment phase, the Aoba tries to bombard Port Moresby again. This time, the Japanese player gets a 4, which would have been a hit on the Australians except for the fact that the Aoba has been damaged by the Northampton and had its bombardment value reduced.
During the ground combat phase, we are left with two broken units fighting each other. The result on the CRT is a 1:0 so the Japanese 144 regiment takes a final hit and is eliminated while the Australians are fine. The Aussies make their rally roll and are back and ready for more.
In the Disadvantage Movement Phase, Japanese Task Force 1 stays put as it is in striking range of the US carriers though they are undetected. With the failure of the Japanese amphibious invasion, Task Force 3 withdraws from the coast of Port Moresby.
The Day marker is moved from 8 to 10. The lighting marker moves clockwise along the track and we are at Dusk. The Allies win advantage.
During the advantage movement phase, the Allies manage to detect Japanese Task Force 1 and see their chance to go up a victory level by possibly sinking one of the Japanese carriers. Both air units from the Yorktown and Lexington scramble during the air mission phase and strike out at the Japanese TF only 3 hexes away. The mission is uncoordinated.
 |
| The USS Yorktown. |
The American planes are detected as they reach the Japanese carrier task force and they get intercepted by Japanese CAP. A brutal battle in the air follows, with the Japanese thoroughly trashing the Americans. They score 3 hits on the American air units, 2 of which are taken on one air unit (aborting it) while the remaining American air unit takes another hit. Flak from the Japanese ships inflicts 1 more hit, which aborts the other plane. Misery. The only positive thing for the Americans is that they suffered no step losses during the dusk carrier landing procedure.
 |
| US carriers send 2 air units to hit the Japanese task force. |
The Disadvantage Movement phase for the Japanese ends up with the American Task Force 1 detected so they send out their planes to hit at the Allied ships this time. The mission is coordinated.
The Japanese planes are detected as they arrive in the same hex as the American carriers. This time, the CAP results are reversed. The US player takes 3 hits on CAP from the Japanese, which eliminates one of the American carrier air units completely. The Japanese take 1 hit in the air battle. They take another hit from the American flak on the way to their target (primary is Lexington, secondary is Yorktown). Unfortunately, both attacks miss and the Japanese return to their carriers. During the dusk landing procedure, the Japanese player rolls an 8 for one of the air units and takes 1 hit. What a disaster.
 |
| The Japanese do the same. |
The Day Marker moves from 10 to 12 and the Lighting condition is Night. The Americans use the cover of night to retreat back towards Australia while the Japanese begin to withdraw from the battle. Neither side has a decisive advantage in air or ships to take the other on and win while still having enough time to Deactivate. There is no way to pit the remnants of these two forces against each other in a way that makes any sense within the general framework of the war. Neither side managed to fulfill their victory conditions at even a tactical level so the result of the battle is a draw.
 |
| "Alright, we'll call it a draw." |
Conclusion: Wow! What an incredible game. It is a very tense affair with lots of units doing different things and somehow it all comes together and just makes good sense. I love the built-in "time compression" of the Contact Phase that allows for several days to pass before slowing down the action in the Battle Cycle. I found the search procedures a little difficult and tedious at first but by the end of the battle, it was second nature.
I found the struggle for Port Moresby to be very tense and I was interested in how it drew in all the different kinds of units and desperate attempts by both sides to change the course of the land battle. I am interested to see what kind of changes that Mark Herman makes for the new edition of Pacific War because this seemed quite polished and intuitive even for a 30 year old game. If you are interested at all in this period of history, I suggest giving it a try.
Although there are some huge campaigns that take hundreds of hours to play, there are also eight battle scenarios like this one that are very playable in a short amount of time and probably just as enjoyable. One thing I would have to mention is that the counter information is extremely small. I hope this issue is addressed somehow in the reprint. Anyway, great stuff!
Hey there. I've been following your blog for quite awhile now and you post some of the best AARs around. I have a flipboard magazine called After Action and your posts provide some of the best content I have in there. At the moment I have over 400 followers so if they aren;t seeing your grreat content here, they are getting exposed to it. Here's a link if you would like to see: https://flipboard.com/@miker42/after-action-9takaajty
ReplyDeleteBY the way, I own quite a few of the games you have but have never played. If you would ever like to patiently have a go at one on VASSAL or something like that sometime, let me know. mike (at) bigthinkgames (dot) com
Thanks Mike! That's very kind of you. I'm happy to see that people are enjoying my blog and thank you for sharing it with your followers. I would love to get some Vassal going some day when I have a bit of time. My wife and I just had a kid so time is at a real premium these days. I'll definitely send you a message one of these days when things slow down a bit. Thanks again for your kind comments!
DeleteHey Brad, no time to read this tonight but to follow up on what Mike said above thought you might be interested in who got blog of the year here... http://grognard.com/generics/boardgame-wrapup-2014.html
ReplyDeleteCheers,
Aaron
Thanks man! You know, I had no idea about that. What an honour! It's really humbling to hear back from people who enjoy my blog. I always thought it would just be a tiny space on the web for me to free associate about games without any expectations of an audience but I've met so many great people through it. You know, I can honestly say that I've never had a negative experience with this community. Gives me motivation to keep going with it. Hope you are doing well and getting some time to game too!
DeleteCongratulations on another great expose both of a grand game and a possible history. Don't have this (could have got it in an auction some years ago for >$60 ! Worth that much?).
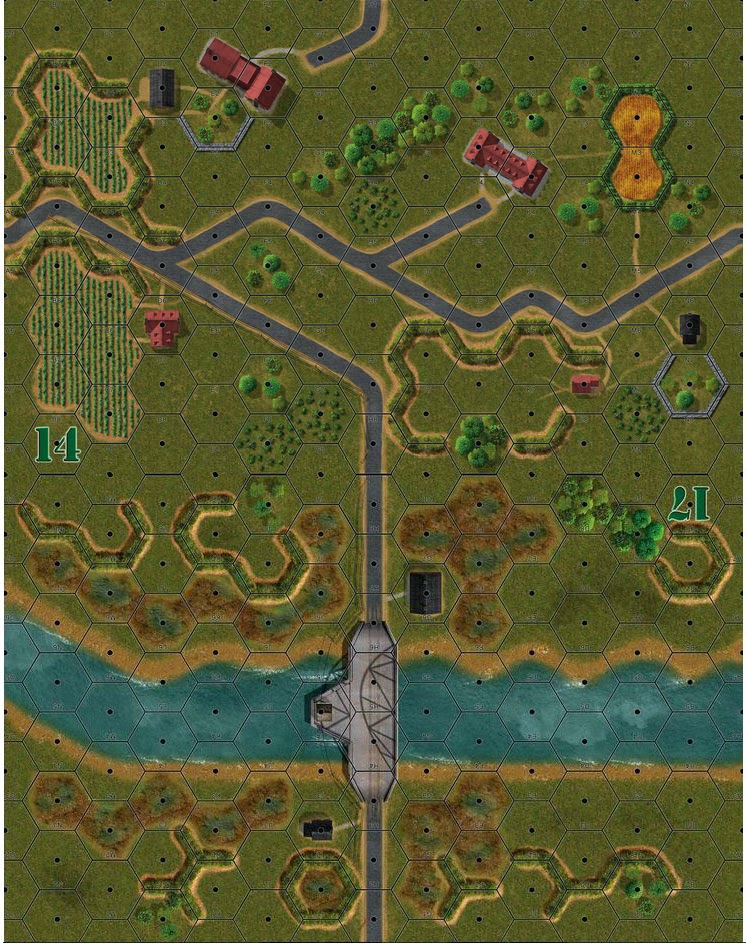
ReplyDeleteTook me a while to recognize the map rotated by 135 degrees! (North is down & right)
Also please compare on difficulty of learning/keeping in mind rules and playing with the other VG fluent monsters you wrote about: Vietnam and Gulf Strike/Aegean S.
Good to hear from you, Mircea! I don't remember what I paid for Pacific War but I think it was in the $45 to $60 range. I also have troubles with the map and keep wanting to rotate it.
DeleteI've only played a bit of Pacific War but if I had to make a comparison, I would say Pacific War is actually one of the games that was easier to learn than any of the others. I think it might be because of the rulebook. It's so very well written with the detailed example of play to bring it all together. Everything just sort of makes sense too. I get the impression that Mark Herman just had a better idea of playability at the larger scale that Pacific War provides. Gulf Strike is a very demanding system for the player and it takes a while to see the beauty of its design. Pacific War is still quite complex but I spent much less time reading the rules than in Gulf Strike.
Also, the beauty of Pacific War is that you can play the smaller scenarios and have lots of fun without ever trying the full campaign game. I never got that much out of the smaller scenarios with Vietnam. It seems like you're either in for the full insane commitment of the campaign or nothing. They are all incredible games though. I still can't believe that it was all from one company. What's your favorite VG game? Do you mostly play moderns or do you like other eras too?
My favorite VG game is Gulf Strike (first love ;-) but also Panzer Command, Ambush and NATO are not bad. I would have loved to have and play more...
DeleteI tend to read on and play most eras, although haven't played any American Civil War and only little ancients/medievals.
Nice play through. Thaks.
ReplyDeleteThanks Jason!
DeleteGreat play. Nice to see people pulling this out, love this game. Awesome draw reference to finish the AAR.
ReplyDeleteThanks John! I really can't wait to set up a big campaign and play it through some day. It just plays so smoothly.
DeleteBrad, would love to see an AAR of a Campaign Scenario.
Delete