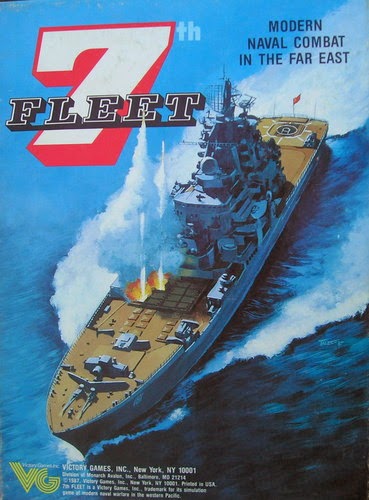
Aegean Strike: The Battle for North Africa
Before we get started, each naval unit gets a single detection roll.

1.) The SSN nearest Italy in AS-03 detects the US carrier group in AR-03.
2.) The Soviet surface fleet in AV-06 is detected by the American SSN in AV-05. In turn, the SSN is also detected.
3.) The Soviet SSGN near the coast of Egypt in AX-07 is not detected nor is the American SSN in the adjacent hex to the north AX-06.

Turn 1 begins!
First Action Stage
First Naval Movement Determination Phase:
The USA and USSR roll for Naval Movement Points for the phase. The US player gets 3 NMPs and the USSR gets 4 NMPs.
First Movement Phase
The USSR starts off with some sub hunting. Launching 3 Ka-25s from the Soviet CVH and CGH, the USSR player manages 2 hits on the American SSN in the AV-06 hex.
Next, the Tu-22 and the MiG-23 in Benghazi take off and head towards the American carrier group. They are detected by the E-2 circling above the carrier and an F-14 on CAP intercepts the incoming Soviet planes. The F-14s shoot down all of the MiG escorts without even being detected. However, the Tu-22s get through and manage to score a hit on the American carrier. 1 hit is assigned to the EA-6 Prowler squadron (that was dumb, now that I think about it - I just hampered my ECM ability on all my airstrikes from the carrier for the rest of the game).
The USSR player activates the SSGN off the coast of Egypt and it launches a cruise missile at the Alexandria air base, achieving 2 hits. It then moves west towards Benghazi, still undetected. It sits off the coast, waiting to sneak up and launch its remaining SSMs on the US carrier group as it approaches from the north.
Both CGs adjacent to the Egyptian coastline are activated and launch cruise missiles at the US airbase in Alexandria. One missile scores 2 hits and the other manages a hit. The base at Alexandria has taken 5 hits, one shy of what is needed to take it out of operation.
The US player decides to send his planes out on a sub hunt. A P-3 Orion from Sigonella and an S-3 from the carrier both fail to hit the Soviet SSGN.
Next, the SSN in AV-06 activates and launches ASM at the Soviet CGH, scoring 2 hits on it in total. The other SSN, two hexes away from the Soviet surface stack, launches ASM next. The first one hits the CVH for 5 damage, which sinks it. The second attack sinks the CGH after scoring 2 hits.
Wishing to keep their carrier group together and intact, the US player decides not to move any surface ships and ends the segment.
End of Phase Comments:
...Wow, half of my entire Soviet surface group just got wiped out in the first part of turn one without a single thing to show for it. A couple of things I've already learned from my setup. Number 1 - you just can't ignore submarines. They can eliminate surface ships quite easily and in bulk. It might have been better to set up submarines around my surface group to help avoid detection right off the bat.
Better yet, it would have been worth all my naval movement points in the first initiative segment to sink one or both of those US subs. The F-16s would not be so great of a concern considering that they have no ASM capability (though they do have a so-so bombardment rating). Putting the Soviet SS near Italy in hopes of catching the US surface group was worse than ineffective.
Although one of the subs did detect the US carrier group, they did not have any ASM capability to fire at it. The SS should have been placed as pickets around the Soviet surface group to detect and attack American SSNs.
I've also managed to lose all of my MiGs in the first go. This means any offensive air power against the American surface group will almost certainly get show down by CAP on the way in. Was it worth the 1 hit on the American carrier? Certainly not!
Considering the very high Soviet losses (2 major surface ships and 6 air units) thus far, I'm wondering if this is worth continuing to play. I considered abandoning the game at this point but the masochist in me wants to see this thing through.
Second Action Stage
Second Naval Movement Determination Phase:
USSR - 3 NMPs
USA - 2 NMPs
Second Movement Phase

1.) The SSN nearest Italy in AS-03 detects the US carrier group in AR-03.
2.) The Soviet surface fleet in AV-06 is detected by the American SSN in AV-05. In turn, the SSN is also detected.
3.) The Soviet SSGN near the coast of Egypt in AX-07 is not detected nor is the American SSN in the adjacent hex to the north AX-06.

Turn 1 begins!
First Action Stage
First Naval Movement Determination Phase:
The USA and USSR roll for Naval Movement Points for the phase. The US player gets 3 NMPs and the USSR gets 4 NMPs.
First Movement Phase
First Initiative Segment:
The USSR starts off with some sub hunting. Launching 3 Ka-25s from the Soviet CVH and CGH, the USSR player manages 2 hits on the American SSN in the AV-06 hex.
Next, the Tu-22 and the MiG-23 in Benghazi take off and head towards the American carrier group. They are detected by the E-2 circling above the carrier and an F-14 on CAP intercepts the incoming Soviet planes. The F-14s shoot down all of the MiG escorts without even being detected. However, the Tu-22s get through and manage to score a hit on the American carrier. 1 hit is assigned to the EA-6 Prowler squadron (that was dumb, now that I think about it - I just hampered my ECM ability on all my airstrikes from the carrier for the rest of the game).
The USSR player activates the SSGN off the coast of Egypt and it launches a cruise missile at the Alexandria air base, achieving 2 hits. It then moves west towards Benghazi, still undetected. It sits off the coast, waiting to sneak up and launch its remaining SSMs on the US carrier group as it approaches from the north.
Both CGs adjacent to the Egyptian coastline are activated and launch cruise missiles at the US airbase in Alexandria. One missile scores 2 hits and the other manages a hit. The base at Alexandria has taken 5 hits, one shy of what is needed to take it out of operation.
First Reaction Segment
The US player decides to send his planes out on a sub hunt. A P-3 Orion from Sigonella and an S-3 from the carrier both fail to hit the Soviet SSGN.
Next, the SSN in AV-06 activates and launches ASM at the Soviet CGH, scoring 2 hits on it in total. The other SSN, two hexes away from the Soviet surface stack, launches ASM next. The first one hits the CVH for 5 damage, which sinks it. The second attack sinks the CGH after scoring 2 hits.
Wishing to keep their carrier group together and intact, the US player decides not to move any surface ships and ends the segment.
End of Phase Comments:
...Wow, half of my entire Soviet surface group just got wiped out in the first part of turn one without a single thing to show for it. A couple of things I've already learned from my setup. Number 1 - you just can't ignore submarines. They can eliminate surface ships quite easily and in bulk. It might have been better to set up submarines around my surface group to help avoid detection right off the bat.
Better yet, it would have been worth all my naval movement points in the first initiative segment to sink one or both of those US subs. The F-16s would not be so great of a concern considering that they have no ASM capability (though they do have a so-so bombardment rating). Putting the Soviet SS near Italy in hopes of catching the US surface group was worse than ineffective.
Although one of the subs did detect the US carrier group, they did not have any ASM capability to fire at it. The SS should have been placed as pickets around the Soviet surface group to detect and attack American SSNs.
I've also managed to lose all of my MiGs in the first go. This means any offensive air power against the American surface group will almost certainly get show down by CAP on the way in. Was it worth the 1 hit on the American carrier? Certainly not!
Considering the very high Soviet losses (2 major surface ships and 6 air units) thus far, I'm wondering if this is worth continuing to play. I considered abandoning the game at this point but the masochist in me wants to see this thing through.
Second Action Stage
Second Naval Movement Determination Phase:
USSR - 3 NMPs
USA - 2 NMPs
Second Movement Phase
Second Initiative Segment
The USSR player starts off by sending his Tu-20 to mine AU-06. The Tu-22 goes for a bombardment of the FEBA hex but fails miserably (rolling a 10). The FAC gets activated and heads for the US carrier group. Undetected, it is able to get close enough to launch its SSMs at the carrier but only scores 1 hit damage. Still, that's not too bad! The hit on the carrier is assigned to an F-14.
Next, I decided on closing the barn doors after the horses had already left, The Soviets sent an SSN west to destroy the American SSN in AV-06. A short battle ensued with the Soviet submarine scoring 2 hits (for a total of 4 damage on the US sub) while taking 1 hit itself. I suppose I could justify this attack by saying that I was trying to keep the Soviet sub fleet intact by taking out American sub-surface capability but the real threat is actually from the P-3s and S-3 Vikings and that's something I can do nothing about as the Soviet player.


Second Reaction Segment
The American carrier and the destroyer in AR-03 move 2 hexes south together. A P-3 Orion from Sigonella launches and detects the Soviet SSGN sitting off the coast of Tripoli. It attacks it for 3 damage. The carrier launches S-3 Vikings, which finishes off the Russian sub. A-6 Intruders go for the stack of Soviet ships near Tripoli in AV-07 and fail to score a hit.
End of Phase Comments:
Another devastating series of losses for the Soviets. With no air cover, the Soviet surface fleet is completely open to air attack. The decision to send the FAC out to hit the American carrier was born of desperation and it didn't really pay off. The big loss here was the Sovet SSGN. It was a pretty deadly part of the Soviet arsenal that could have dealt a killing blow to the US carrier. I can't see this ending particularly well for the Soviet player. But here we go!
Third Action Stage
Naval Movement Determination Stage:
Not many ships eligible to move around anymore but we roll and the USSR gets 2 while the USA gets 1.
Naval Movement Determination Stage:
Not many ships eligible to move around anymore but we roll and the USSR gets 2 while the USA gets 1.
Third Reaction Segment
The segment starts off with the US player sending out A-6 Intruders to strike at the Soviet surface fleet near the FEBA marker. The Soviet CA takes 2 hits and is nearly sunk.
The US player tries some sub hunting with the P-3 Orions and the S-3 Vikings but finds no joy. Two F-18 squadrons launch and try to hit the FAC adjacent to the carrier task force. The ships are SSM depleted so this is more for fun than anything else. The Hornets score 2 hits on the FAC while taking 1 very lucky hit from AAA fire.
The US player moves his battleship from AR-03 to link up with the carrier in AR-05. I could have used it to utterly destroy the FAC but there's no real point to using up an SSM when the Soviet surface fleet is still clinging on further east.
The Soviet player sends out his Tu-20 on its remaining sortie to put another mine in AV-06. The only remaining ship that hasn't moved is the Soviet SSN in AZ-06, which moves directly west to engage the American SSN in AX-06. It detects the sub and combat ensues. The American SSN takes 1 hit while the Soviet sub is hit for 2.
End of Turn Analysis:
Well, that began and ended really poorly for the Soviets. Thanks to a less than ideal Soviet setup, the Soviets lost two of their most important ships on the first part of the turn and things just kept going downhill from there. The lack of pickets to keep the surface ships safe from detection and attack really hurt the Soviets from the start. The placement of SS subs near the carrier group did literally nothing. A couple of lucky one-shots from air and the FAC managed to damage the US carrier but not enough to really hamper air operations. In the coming turn, the Soviets will undoubtedly lose more ships to air attack from the US carrier until the entire surface fleet is wrecked. After that, it will simply be a matter of moving the carrier group close enough to hit the FEBA marker and help the Egyptians to an easy victory over the Libyans. So I'm calling the game here.
This is one of those games I want to set up all over again using the lessons learned from this play and have another go at it. On the bright side, I've learned a bit here about closely examining your unit capabilities before setup and trying to have a really good clear picture of what each unit will be doing and why and when. Aegean and Gulf Strike are severely punishing games for anyone who doesn't take the time to seriously think about these things before play. This particular case should help prove the point.
I would like to thank my opponent, me, for being gracious in both victory and defeat. I also look forward to playing myself again very soon should our schedules permit. Congratulations to myself, the winner!

The US player tries some sub hunting with the P-3 Orions and the S-3 Vikings but finds no joy. Two F-18 squadrons launch and try to hit the FAC adjacent to the carrier task force. The ships are SSM depleted so this is more for fun than anything else. The Hornets score 2 hits on the FAC while taking 1 very lucky hit from AAA fire.
The US player moves his battleship from AR-03 to link up with the carrier in AR-05. I could have used it to utterly destroy the FAC but there's no real point to using up an SSM when the Soviet surface fleet is still clinging on further east.
Third Initiative Segment
The Soviet player sends out his Tu-20 on its remaining sortie to put another mine in AV-06. The only remaining ship that hasn't moved is the Soviet SSN in AZ-06, which moves directly west to engage the American SSN in AX-06. It detects the sub and combat ensues. The American SSN takes 1 hit while the Soviet sub is hit for 2.
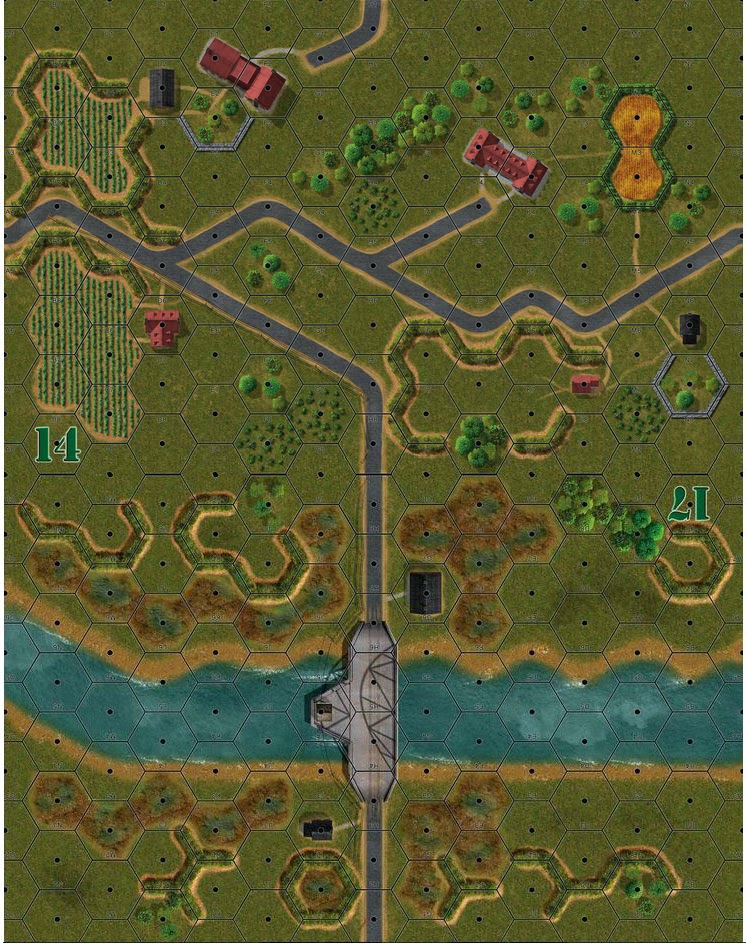
 |
| End of Game: One crowded map! |
End of Turn Analysis:
Well, that began and ended really poorly for the Soviets. Thanks to a less than ideal Soviet setup, the Soviets lost two of their most important ships on the first part of the turn and things just kept going downhill from there. The lack of pickets to keep the surface ships safe from detection and attack really hurt the Soviets from the start. The placement of SS subs near the carrier group did literally nothing. A couple of lucky one-shots from air and the FAC managed to damage the US carrier but not enough to really hamper air operations. In the coming turn, the Soviets will undoubtedly lose more ships to air attack from the US carrier until the entire surface fleet is wrecked. After that, it will simply be a matter of moving the carrier group close enough to hit the FEBA marker and help the Egyptians to an easy victory over the Libyans. So I'm calling the game here.
This is one of those games I want to set up all over again using the lessons learned from this play and have another go at it. On the bright side, I've learned a bit here about closely examining your unit capabilities before setup and trying to have a really good clear picture of what each unit will be doing and why and when. Aegean and Gulf Strike are severely punishing games for anyone who doesn't take the time to seriously think about these things before play. This particular case should help prove the point.
I would like to thank my opponent, me, for being gracious in both victory and defeat. I also look forward to playing myself again very soon should our schedules permit. Congratulations to myself, the winner!

Good job, Brad!
ReplyDeleteHey Mark! You're the one that pointed me towards the Gulf Strike system so thanks!
DeleteGreat comment about knowing own capabilities inside-out. This is already half of Sun Tzu's Way !
ReplyDeleteThe other half is knowing the enemy just as well. Then comes the mutual-reflexive-thinking part. In chess knowing capabilities is dead easy but the whole interaction is for grandmasters.
A best outcome of mutual-reflexion is, in my opinion, Well Calibrated Fear. To rightfully fear what ought to be feared, not go into the trap but think of ways to overcome that (not the feeling of fear, but its simulated basis). Also NOT fear what are minor or acceptable risks for their payoff.
The good part of GS/AS fear compared to Chess is that it's not deterministic Alive/Dead, it's in finer degrees of damage and probability.
So, mighty Lone Warrior, go put your mind(s) strike fear in yoursel(ves) and come through better !
Thanks Mircea! I actually went ahead and played it again (unreported, sorry) with all your suggestions. I created a perimeter of subs around the Soviet surface fleet and although the US managed to sneak in a sub and get a couple of hits, they were quickly dispatched with ASW helos and SS subs. After that, the Soviets turned the SSGNs loose on the American carrier force and sunk it. It was an overwhelming victory for the Russians, who took out the remaining surface ships with bombers. After that, I easily scored 5 hits on the FEBA marker and moved it straight towards Cairo. It was a huge win! Thanks again for your suggestions. I'm stumbling through the first turn of scenario 2 in AS and I'm already learning quite a lot. Bulgaria is basically going it alone on the ground against Greece and Turkey but the Russians have thrown in their air force to help out and so far I've managed a bit of success with the Warsaw Pact. I really love this system.
Delete