Freedom in the Galaxy - Flight to Egrix
Over the summer, I received a copy of Avalon Hill's version of Freedom in the Galaxy, a space wargame which was published in the middle of the Star Wars craze in the late 70s/early 80s (originally published by SPI in '79 and then by AH in '81). Clearly using the Star Wars movies as its inspiration, Freedom in the Galaxy aspires to epic space opera as one player takes on the role of the ruler of a cruel galactic empire while the other player controls the idealistic rebellion. The objective of the rebel player is to use his characters to start a successful revolution while the Imperial player must crush it.
There are kind of two games in one going on here with Freedom in the Galaxy. Military units engage in combat much like a standard wargame with the use of CRTs, etc., while at the same time there is an almost "roleplaying" type game happening with characters on both sides trying to influence events. Imperial characters work together with their military units or alone to prevent galactic rebellion while Rebel characters are sent all throughout the galaxy to foment rebellion and, with enough luck, spark a "domino effect" that will bring in other planets on the Rebel side.
Starting planetary rebellions is extremely tough and takes time and luck. Characters need to conduct missions to influence a planet and begin rebellions. Mission cards are used to resolve whether or not they succeed and to what degree. The results on the cards can often be brutal and unforgiving towards the characters and mission success is sometimes just as likely as the characters having to fight it out with a dangerous creature or irate locals. In my own limited experience, it seems that sending individual characters out on their own to do missions often results in their demise. On the other hand, sending a team of characters on the same mission limits how much you can do in a single turn. This is a dilemma that the Rebels will face throughout a game of Freedom in the Galaxy. The Rebels are always at a disadvantage in terms of time and numbers while the Imperial player is always interested in finding ways to run out the clock on them.
The flow of play for the game is actually pretty simple in the smaller scenarios. At the start of the turn, the Rebel player performs all his moves and then assigns various missions to his characters. Missions include Diplomacy (which can undermine a planet's loyalty to the Empire), Sabotage (an attempt to destroy military units), Subverting Troops (turning Imperial military units to the Rebel side), Assassinations, Coups, and Gathering Intelligence Information, to name a few. The major aim of the Rebel player is to turn a planet's loyalty towards the Rebel side and, when the time is right, spark a rebellion.
The Imperial player goes next in the turn and basically performs all the same actions as the Rebels although, of course, their efforts are aimed at keeping planets loyal, killing or capturing Rebel characters, and basically just keeping everyone in line.
Scenario Background
In this small scenario, three rebel characters are attempting to start a rebellion in the Egrix planetary star system. They have six turns to try and raise as much hell as possible and hopefully begin a rebellion or two. The three planets of the Egrix system are Charkhan, Angoff, and Quibron. Each of these planets has an environ (Charkhan actually has two), which can influence the success of certain mission types that Rebel or Imperial characters attempt during the course of the game. The planets also have a loyalty rating towards either side which can change thanks to events, diplomacy, coups, etc. If the Rebel characters can get a planet into a state of unrest and begin a rebellion, the "wargame" part of Freedom in the Galaxy kicks in and military combat with CRTs, etc., are used to determine the galaxy's fate while the characters take on more of a background role than before the rebellion starts.
All three planets of the Egrix system are controlled by the Empire at the start of the game. Imperial Militia units (1-0 strength) are placed on Quibron. A Patrol unit (1-2) and Militia (1-0) are on Charkhan and the rest of the forces (several Patrol and Line units) are on Angoff. Although the units are spread out a bit, Angoff gets the bulk of the forces due to its current loyalty rating, which is Neutral. The other two planets are fairly loyal to the Empire - Charkhan is even considered Patriotic.
For the Rebel player to win this scenario, they need 12 victory points, which is pretty much impossible from what I can tell. On the other hand, I am pretty new to this game and there are still some strategies I need to try in order to find a way to get close to this number.
Making Angoff an even more tempting target for the Rebels is the fact that it is dangerously susceptible to a military coup that could push its Loyalty either towards either the Imperial or Rebel faction. For this reason, the Imperial player hopes to head this off by placing two Imperial characters, Jon Kidu and Vans Ka Tie-A on Angoff.
Jon Kidu and Vans Ka-Tie-A will be used to search for and capture or kill Rebel characters as well as put down any simmering rebellions on any of Egrix system's three planets. Each character in Freedom of the Galaxy has a number of attributes (on the back of the cards here) and special abilities or bonuses when going on certain missions. Jon Kidu is a thinker and strategist, with a higher Intelligence and Leadership rating while Vans is an expert assassin with a high Combat rating.
On the other side of the fence, the Rebels get three characters of their own. Boccanegra is sort of a space pirate character reminiscent of Han Solo in many ways and he comes with his own ship, the Planetary Privateer. The other two characters with him are Frun Sentel, basically a big lug with more combat skills than brains, and Doctor Sontag, a genius who excels at matters of Diplomacy and who is able to heal other characters should they be wounded.
Turn 1
Rebel Phase
Turn 1 begins and the rebels land not on Angoff, but on Charkhan. The Imperial's Planetary Defense Base for Charkhan scans the stars but does not detect the incoming rebels. Undetected rebels have an advantage in that the Imperial player cannot conduct searches for them or conduct reaction moves, such as moving military units to Rebel locations during Rebel turns.
Incognito, the rebels conduct two separate missions. Frun Sentel will attempt to start a Rebel Camp, which is basically a small band of rebels that can conduct their own missions independently without the need for the characters. The plan is to use the Rebel Camp to start trouble on Charkhan while the characters move to Angoff later and start the real rebellion. While Frun is off recruiting fellow rebel sympathizers, Dr. Sontag and Boccanegra decide to gather information about the nearby Imperial militia units.
While on their missions, Frun is detected by the Imperials thanks to an enemy agent while insect-like creatures attack and sting Sontag and Boccanegra. Despite these setbacks, Frun manages to start up a rebel camp and Sontag uses a first-aid kit to heal himself. Sontag and Boccanegra, however, have nothing to show for their efforts.
Imperial Phase
The Imperials move a 1-2 Patrol unit off Angoff and on to Charkhan, hopefully to track down Frun Sentel. Another militia unit (1-0) moves from the wild environs of Charkhan closer to where the characters have been detected.
Meanwhile, on Angoff, Jon Kidu sees a prime opportunity to conduct a coup and install a more Imperial-friendly government on the planet. Once a coup is conducted, it cannot be done again by either side so this is a prime opportunity for the Imperials. Both Kidu and Vans are successful in their attempt and Angoff's loyalty rating towards the Empire rises from Neutral to Patriotic. This will make it much more difficult for the Rebels to start any trouble here.
Turn 2
Rebel Phase
The Rebel characters, having set up a Rebel Camp successfully on Charkhan, decide to move to Angoff. They slip by the planetary defenses undetected and land on the planet. Boccanegra and Sontag conduct a successful diplomacy mission, shifting Angoff's loyalty to the Empire down from Patriotic to Loyal. It's not much but it's a start.
Frun Sentel attempts to start another Rebel Camp here on Angoff but fails, despite finding a small group of locals who succeed in taking down the Planetary Defense Base (PDB) network temporarily.
The Rebel Camp on Charkhan conducts a diplomacy mission with the local government but doesn't get anywhere.
Imperial Phase
The Imperials quickly put the PDB back up and pull their patrols from Charkhan back to Angoff. They are amassing military forces in the hopes of finding the Rebels.
Vans and Kidu try to gather information on Angoff in order to find any rebel characters. They immediately find that the rebel scum are planetside and bumble their way into a trap set by Sentel, Sontag, and Boccanegra. Luckily, both Vans and Kidu escape the trap after nearly being captured and the turn ends.
Turn 3
Rebel Phase
The game is nearly half-over and the Rebels have made little progress. It's time to heat things up on Angoff.
Frun Sentel and Sontag attempt a Diplomacy Mission while Boccanegra goes off on his own and tries to subvert local Imperial troops to turn against the Empire and fight for freedom.
Boccanegra, however, is immediately captured by the Imperials. It seems he has seriously underestimated the Imperial troops' willingness to fight against their own comrades. Oops!
Sontag and Frun fail miserably in their Diplomacy mission, making a serious error in local protocol. The native Yesters become even more loyal to the Empire, with their government loyalty rating raised to Patriotic levels.
What a disaster for the Rebels.
Imperial Phase
Having already captured one of the Rebel characters, the Imperials are riding high. The capture of Boccanegra means that the Rebels will suffer the loss of 2 VPs if he is not rescued by game's end. The Imperials decide to conduct a "Gather Information" mission in order to knock down the Rebels VP count even further. Unfortunately, the Imperials push things too far and a civil war breaks out on Angoff. The planet's loyalty tumbles from Patriotic to Neutral. This was not how things were supposed to work out for the Empire.
Turn 4
Rebel Phase
With only a handful of turns left in the game, the two remaining rebel characters need to make some big decisions. Should they try to rescue Boccanegra from the Imperial clutches? Or should they do their best without him?
Both Frun and Sontag agree to mount a rescue effort to save Boccanegra. While on the mission, they are attacked by irate locals as well as some droids. Frun is wounded slightly during the fray but both of them are alive, despite not rescuing their buddy.
The Rebel Camp on planet Charkhan has some success with its Diplomacy mission, turning the planet from Patriotic to Loyal.
Imperial Phase
Jon Kidu and Vans decide to try and salvage the situation on Angoff by attempting Diplomacy but they are unable to improve the planet's loyalty to the Empire.
Turn 5
Rebel Phase
Things are bleak for the Rebels but a rebellion on Angoff is possible, although unlikely at this point. Giving up on rescuing Boccanegra, Frun and Sontag decide to focus all their efforts on starting a planetary rebellion. By conducting a very successful Diplomacy mission, they manage to shift Angoff's loyalty to Unrest. The planet is ready for rebellion. All it needs is one little push in the right direction.
Imperial Phase
With few options left, Jon Kidu and Vans Ka-Tie-A attempt a desperate Diplomacy mission to stabilize Angoff. They have a little luck after a meeting with the local government, placing the planet up from "Unrest" to "Dissent". This may be just enough to save things and prevent Angoff from falling into Rebel hands.
Turn 6
Rebel Phase
Last turn for the rebels. Pulling out all the stops, Frun and Sontag decide to split up. Sontag will meet with Angoff's governers and military forces in an attempt to put the planet into Unrest. Once the planet is at this stage, Frun will coordinate military forces and start a rebellion.
Sontag's mission must succeed before Frun's mission card comes up. The chances of this happening are slim but it's the last turn and they are desperate.
Sontag's mission goes well and the planet is at Unrest, ready for Frun Sentel's signal to start the rebellion in full. On his way back from the mission, Sontag is attacked suddenly by droids and is killed. His death is not in vain, however, as Frun's mission card comes through with a success and the rebellion starts on Angoff!
With 9 resource points on the planet, the rebels purchase two 2-1 units and three 1-0 units to throw at the Imperial military forces on Angoff.
Frun leads the attack on the Imperial military forces. Unfortunately, his leadership rating is not good so he only gives a one column shift to his forces' benefit. If Boccanegra had been rescued, his substantial leadership capabilities would have helped out here much better.
Jon Kidu, a very capable military leader, is in charge of the Imperial forces, which gives them three column shifts on the CRT favoring the Imperial side.
The battle begins and everything is on the line in this last turn. The Imperial forces inflict three hits on the Rebels, taking out all of their militia. Frun Sentel and his forces are trounced. Not a single Imperial military unit is eliminated. It seems the Imperial forces will be able to put down this rebellion in due time.
The Rebel Camp on Charkhan has some success in its own efforts, taking the loyalty level from Loyal to Neutral.
Imperial Phase
Jon Kidu and Vans Ka-Tie-A decide to undertake a Stop Rebellion mission in hopes of taking away any end-game VP from the Rebels. During their attempt, however, irate locals attack both characters. Jon Kidu slips away from the battle but Vans is quickly overwhelmed by the locals and is killed. Jon continues the mission on his own but his attempt at stopping the rebellion is a failure.
The game ends.
Victory Points Tally
With one planet in rebellion, the Rebels gain 6 VPs. Since the evil Vans Ka-Tie-A is dead, they gain another 1 VP. However, since Boccanegra was captured, the Rebels suffer the loss of 2 VPs. The death of Dr. Sontag also means another 1 VP loss for them.
Despite the Herculean efforts of the Rebels during this small beginner scenario, the Rebels have only a measly 4 VPs to show at the end of it all. The capture of Boccanegra dealt a serious blow to the Rebel efforts and valuable time was wasted unsuccessfully trying to rescue him . The rebel camp on Charkhan was okay but I'm not sure it was really worth it in the end. A successful planet-wide rebellion on Angoff with a good leader may have led to the Rebels capturing the planet and carrying their revolution on to the other planets. In the end, Freedom in the Galaxy is really about managing your time and resources and pushing your luck at appropriate times, much like any other really good game.
Conclusion
This was an ambitious game for the designers to attempt and whether or not they succeeded has been debated at length on various game forums. A lot of the concepts that the game tried to emulate through various mechanics (e.g. the idea of creating a "domino effect" where rebellion reaches a certain stage that it drags in other planets and systems) are still noted for their elegance. On the other hand, the game's play balance and length (rebels get crushed often / 20 hours for the full galactic campaign game) have been subject to criticism. After spending some time familiarizing myself with the game and its rules over the last few weeks, I started trying the smaller scenarios like this one and although I can't add much in terms of critical evaluation at this point, I have been really enjoying the game.
There are kind of two games in one going on here with Freedom in the Galaxy. Military units engage in combat much like a standard wargame with the use of CRTs, etc., while at the same time there is an almost "roleplaying" type game happening with characters on both sides trying to influence events. Imperial characters work together with their military units or alone to prevent galactic rebellion while Rebel characters are sent all throughout the galaxy to foment rebellion and, with enough luck, spark a "domino effect" that will bring in other planets on the Rebel side.
Starting planetary rebellions is extremely tough and takes time and luck. Characters need to conduct missions to influence a planet and begin rebellions. Mission cards are used to resolve whether or not they succeed and to what degree. The results on the cards can often be brutal and unforgiving towards the characters and mission success is sometimes just as likely as the characters having to fight it out with a dangerous creature or irate locals. In my own limited experience, it seems that sending individual characters out on their own to do missions often results in their demise. On the other hand, sending a team of characters on the same mission limits how much you can do in a single turn. This is a dilemma that the Rebels will face throughout a game of Freedom in the Galaxy. The Rebels are always at a disadvantage in terms of time and numbers while the Imperial player is always interested in finding ways to run out the clock on them.
The flow of play for the game is actually pretty simple in the smaller scenarios. At the start of the turn, the Rebel player performs all his moves and then assigns various missions to his characters. Missions include Diplomacy (which can undermine a planet's loyalty to the Empire), Sabotage (an attempt to destroy military units), Subverting Troops (turning Imperial military units to the Rebel side), Assassinations, Coups, and Gathering Intelligence Information, to name a few. The major aim of the Rebel player is to turn a planet's loyalty towards the Rebel side and, when the time is right, spark a rebellion.
The Imperial player goes next in the turn and basically performs all the same actions as the Rebels although, of course, their efforts are aimed at keeping planets loyal, killing or capturing Rebel characters, and basically just keeping everyone in line.
Scenario Background
In this small scenario, three rebel characters are attempting to start a rebellion in the Egrix planetary star system. They have six turns to try and raise as much hell as possible and hopefully begin a rebellion or two. The three planets of the Egrix system are Charkhan, Angoff, and Quibron. Each of these planets has an environ (Charkhan actually has two), which can influence the success of certain mission types that Rebel or Imperial characters attempt during the course of the game. The planets also have a loyalty rating towards either side which can change thanks to events, diplomacy, coups, etc. If the Rebel characters can get a planet into a state of unrest and begin a rebellion, the "wargame" part of Freedom in the Galaxy kicks in and military combat with CRTs, etc., are used to determine the galaxy's fate while the characters take on more of a background role than before the rebellion starts.
All three planets of the Egrix system are controlled by the Empire at the start of the game. Imperial Militia units (1-0 strength) are placed on Quibron. A Patrol unit (1-2) and Militia (1-0) are on Charkhan and the rest of the forces (several Patrol and Line units) are on Angoff. Although the units are spread out a bit, Angoff gets the bulk of the forces due to its current loyalty rating, which is Neutral. The other two planets are fairly loyal to the Empire - Charkhan is even considered Patriotic.
For the Rebel player to win this scenario, they need 12 victory points, which is pretty much impossible from what I can tell. On the other hand, I am pretty new to this game and there are still some strategies I need to try in order to find a way to get close to this number.
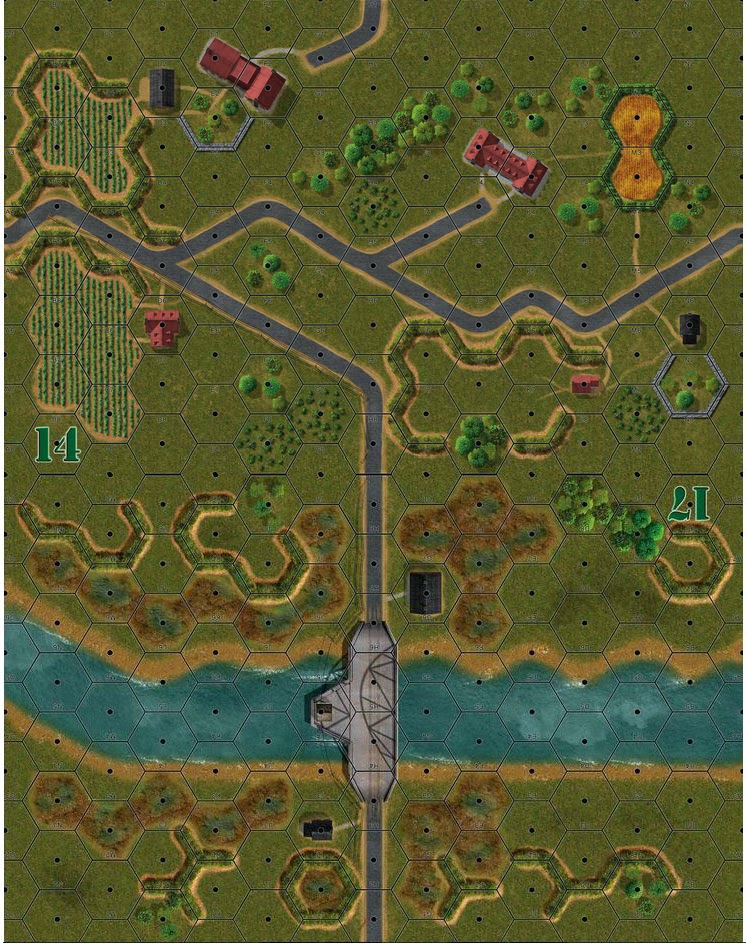
 |
| The Egrix system with its three planets and Imperial units spread out. |
Making Angoff an even more tempting target for the Rebels is the fact that it is dangerously susceptible to a military coup that could push its Loyalty either towards either the Imperial or Rebel faction. For this reason, the Imperial player hopes to head this off by placing two Imperial characters, Jon Kidu and Vans Ka Tie-A on Angoff.
 |
| Bad dudes - Jon Kidu, the ruthless military strategist and Vans Ka-Tie-A, an Imperial knight. |
Jon Kidu and Vans Ka-Tie-A will be used to search for and capture or kill Rebel characters as well as put down any simmering rebellions on any of Egrix system's three planets. Each character in Freedom of the Galaxy has a number of attributes (on the back of the cards here) and special abilities or bonuses when going on certain missions. Jon Kidu is a thinker and strategist, with a higher Intelligence and Leadership rating while Vans is an expert assassin with a high Combat rating.
On the other side of the fence, the Rebels get three characters of their own. Boccanegra is sort of a space pirate character reminiscent of Han Solo in many ways and he comes with his own ship, the Planetary Privateer. The other two characters with him are Frun Sentel, basically a big lug with more combat skills than brains, and Doctor Sontag, a genius who excels at matters of Diplomacy and who is able to heal other characters should they be wounded.
 |
| Our intrepid Rebel heroes. Hey, it was the '70s. |
Rebel Phase
Turn 1 begins and the rebels land not on Angoff, but on Charkhan. The Imperial's Planetary Defense Base for Charkhan scans the stars but does not detect the incoming rebels. Undetected rebels have an advantage in that the Imperial player cannot conduct searches for them or conduct reaction moves, such as moving military units to Rebel locations during Rebel turns.
Incognito, the rebels conduct two separate missions. Frun Sentel will attempt to start a Rebel Camp, which is basically a small band of rebels that can conduct their own missions independently without the need for the characters. The plan is to use the Rebel Camp to start trouble on Charkhan while the characters move to Angoff later and start the real rebellion. While Frun is off recruiting fellow rebel sympathizers, Dr. Sontag and Boccanegra decide to gather information about the nearby Imperial militia units.
While on their missions, Frun is detected by the Imperials thanks to an enemy agent while insect-like creatures attack and sting Sontag and Boccanegra. Despite these setbacks, Frun manages to start up a rebel camp and Sontag uses a first-aid kit to heal himself. Sontag and Boccanegra, however, have nothing to show for their efforts.
Imperial Phase
The Imperials move a 1-2 Patrol unit off Angoff and on to Charkhan, hopefully to track down Frun Sentel. Another militia unit (1-0) moves from the wild environs of Charkhan closer to where the characters have been detected.
Meanwhile, on Angoff, Jon Kidu sees a prime opportunity to conduct a coup and install a more Imperial-friendly government on the planet. Once a coup is conducted, it cannot be done again by either side so this is a prime opportunity for the Imperials. Both Kidu and Vans are successful in their attempt and Angoff's loyalty rating towards the Empire rises from Neutral to Patriotic. This will make it much more difficult for the Rebels to start any trouble here.
 |
| Kidu and Vans conduct a successful coup on Angoff. |
Rebel Phase
The Rebel characters, having set up a Rebel Camp successfully on Charkhan, decide to move to Angoff. They slip by the planetary defenses undetected and land on the planet. Boccanegra and Sontag conduct a successful diplomacy mission, shifting Angoff's loyalty to the Empire down from Patriotic to Loyal. It's not much but it's a start.
Frun Sentel attempts to start another Rebel Camp here on Angoff but fails, despite finding a small group of locals who succeed in taking down the Planetary Defense Base (PDB) network temporarily.
The Rebel Camp on Charkhan conducts a diplomacy mission with the local government but doesn't get anywhere.
Imperial Phase
The Imperials quickly put the PDB back up and pull their patrols from Charkhan back to Angoff. They are amassing military forces in the hopes of finding the Rebels.
Vans and Kidu try to gather information on Angoff in order to find any rebel characters. They immediately find that the rebel scum are planetside and bumble their way into a trap set by Sentel, Sontag, and Boccanegra. Luckily, both Vans and Kidu escape the trap after nearly being captured and the turn ends.
Turn 3
Rebel Phase
The game is nearly half-over and the Rebels have made little progress. It's time to heat things up on Angoff.
Frun Sentel and Sontag attempt a Diplomacy Mission while Boccanegra goes off on his own and tries to subvert local Imperial troops to turn against the Empire and fight for freedom.
Boccanegra, however, is immediately captured by the Imperials. It seems he has seriously underestimated the Imperial troops' willingness to fight against their own comrades. Oops!
Sontag and Frun fail miserably in their Diplomacy mission, making a serious error in local protocol. The native Yesters become even more loyal to the Empire, with their government loyalty rating raised to Patriotic levels.
What a disaster for the Rebels.
Imperial Phase
Having already captured one of the Rebel characters, the Imperials are riding high. The capture of Boccanegra means that the Rebels will suffer the loss of 2 VPs if he is not rescued by game's end. The Imperials decide to conduct a "Gather Information" mission in order to knock down the Rebels VP count even further. Unfortunately, the Imperials push things too far and a civil war breaks out on Angoff. The planet's loyalty tumbles from Patriotic to Neutral. This was not how things were supposed to work out for the Empire.
Turn 4
Rebel Phase
With only a handful of turns left in the game, the two remaining rebel characters need to make some big decisions. Should they try to rescue Boccanegra from the Imperial clutches? Or should they do their best without him?
Both Frun and Sontag agree to mount a rescue effort to save Boccanegra. While on the mission, they are attacked by irate locals as well as some droids. Frun is wounded slightly during the fray but both of them are alive, despite not rescuing their buddy.
 |
| Frun and Sontag try to rescue their team-mate, Boccanegra. |
The Rebel Camp on planet Charkhan has some success with its Diplomacy mission, turning the planet from Patriotic to Loyal.
Imperial Phase
Jon Kidu and Vans decide to try and salvage the situation on Angoff by attempting Diplomacy but they are unable to improve the planet's loyalty to the Empire.
Turn 5
Rebel Phase
Things are bleak for the Rebels but a rebellion on Angoff is possible, although unlikely at this point. Giving up on rescuing Boccanegra, Frun and Sontag decide to focus all their efforts on starting a planetary rebellion. By conducting a very successful Diplomacy mission, they manage to shift Angoff's loyalty to Unrest. The planet is ready for rebellion. All it needs is one little push in the right direction.
Imperial Phase
With few options left, Jon Kidu and Vans Ka-Tie-A attempt a desperate Diplomacy mission to stabilize Angoff. They have a little luck after a meeting with the local government, placing the planet up from "Unrest" to "Dissent". This may be just enough to save things and prevent Angoff from falling into Rebel hands.
Turn 6
Rebel Phase
Last turn for the rebels. Pulling out all the stops, Frun and Sontag decide to split up. Sontag will meet with Angoff's governers and military forces in an attempt to put the planet into Unrest. Once the planet is at this stage, Frun will coordinate military forces and start a rebellion.
Sontag's mission must succeed before Frun's mission card comes up. The chances of this happening are slim but it's the last turn and they are desperate.
Sontag's mission goes well and the planet is at Unrest, ready for Frun Sentel's signal to start the rebellion in full. On his way back from the mission, Sontag is attacked suddenly by droids and is killed. His death is not in vain, however, as Frun's mission card comes through with a success and the rebellion starts on Angoff!
With 9 resource points on the planet, the rebels purchase two 2-1 units and three 1-0 units to throw at the Imperial military forces on Angoff.
 |
| Purchased Rebel units |
Frun leads the attack on the Imperial military forces. Unfortunately, his leadership rating is not good so he only gives a one column shift to his forces' benefit. If Boccanegra had been rescued, his substantial leadership capabilities would have helped out here much better.
Jon Kidu, a very capable military leader, is in charge of the Imperial forces, which gives them three column shifts on the CRT favoring the Imperial side.
 |
| Jon Kidu and Frun Sentel duke it out with their forces on Angoff. |
The battle begins and everything is on the line in this last turn. The Imperial forces inflict three hits on the Rebels, taking out all of their militia. Frun Sentel and his forces are trounced. Not a single Imperial military unit is eliminated. It seems the Imperial forces will be able to put down this rebellion in due time.
The Rebel Camp on Charkhan has some success in its own efforts, taking the loyalty level from Loyal to Neutral.
Imperial Phase
Jon Kidu and Vans Ka-Tie-A decide to undertake a Stop Rebellion mission in hopes of taking away any end-game VP from the Rebels. During their attempt, however, irate locals attack both characters. Jon Kidu slips away from the battle but Vans is quickly overwhelmed by the locals and is killed. Jon continues the mission on his own but his attempt at stopping the rebellion is a failure.
The game ends.
Victory Points Tally
With one planet in rebellion, the Rebels gain 6 VPs. Since the evil Vans Ka-Tie-A is dead, they gain another 1 VP. However, since Boccanegra was captured, the Rebels suffer the loss of 2 VPs. The death of Dr. Sontag also means another 1 VP loss for them.
Despite the Herculean efforts of the Rebels during this small beginner scenario, the Rebels have only a measly 4 VPs to show at the end of it all. The capture of Boccanegra dealt a serious blow to the Rebel efforts and valuable time was wasted unsuccessfully trying to rescue him . The rebel camp on Charkhan was okay but I'm not sure it was really worth it in the end. A successful planet-wide rebellion on Angoff with a good leader may have led to the Rebels capturing the planet and carrying their revolution on to the other planets. In the end, Freedom in the Galaxy is really about managing your time and resources and pushing your luck at appropriate times, much like any other really good game.
Conclusion
This was an ambitious game for the designers to attempt and whether or not they succeeded has been debated at length on various game forums. A lot of the concepts that the game tried to emulate through various mechanics (e.g. the idea of creating a "domino effect" where rebellion reaches a certain stage that it drags in other planets and systems) are still noted for their elegance. On the other hand, the game's play balance and length (rebels get crushed often / 20 hours for the full galactic campaign game) have been subject to criticism. After spending some time familiarizing myself with the game and its rules over the last few weeks, I started trying the smaller scenarios like this one and although I can't add much in terms of critical evaluation at this point, I have been really enjoying the game.
Thanks for the review of the mini-game. I have been wanting to get this game to the table for about two years now. Have you gotten it to the table since the review?
ReplyDelete-joey
Funny you should mention it! It's on my table right now. If you approach the game as a serious wargame with a mind to just "win it" as the rebel player, it's maybe not the greatest idea due to balance issues. However, if you play it as a fun narrative just to see what happens, it's a pretty great game. I can see why it appeals to so many people.
Delete